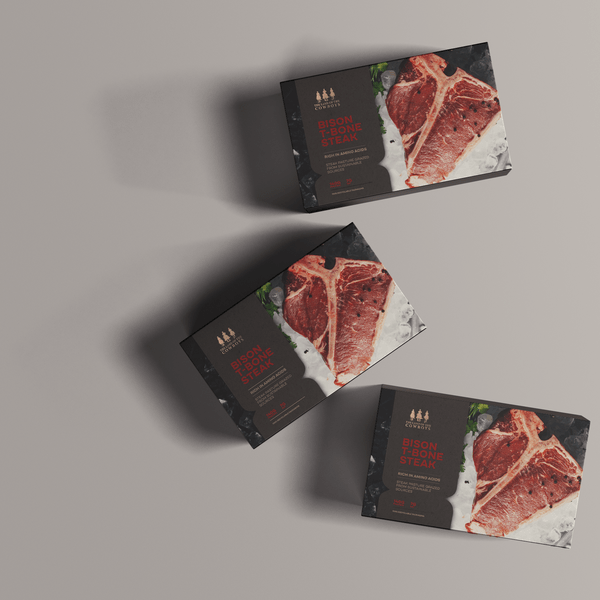
In a tightly regulated category, the pack is your most visible media channel. Eye-catching Cigarette Boxes can elevate perceived quality, boost retail acceptance, and build trust with adult consumers—without compromising compliance or sustainability.
This step-by-step guide walks you from initial brief to press-ready files, with pragmatic choices on structure, materials, finishes, and testing. You’ll also get checklists, pro tips, and metrics so your next run looks better, costs less, and moves faster.
Note: The guidance below is for legal adult markets. Always follow local regulations.
Step 1: Align on Goals, Audience, and Constraints
Before opening your design software, define what success looks like.
- Commercial goals: Premiumization? Cost reduction? Fewer returns? Clear SKU tiering?
- Audience: Adult consumer preferences, buying habits, and sensitivity to sustainability cues.
- Channels: Convenience, grocery, duty-free, e-commerce—each changes handling and shelf realities.
- Regulatory scope: Health warnings, tax stamps, plain-pack rules, track-and-trace (e.g., TPD, FDA).
- Budget and timeline: Prototype rounds, tooling, and go-live date.
Success criteria to set now:
- Target unit cost and waste allowance
- Print quality KPIs (color delta E targets, registration)
- Damage rate thresholds (crush/scuff)
- Compliance sign-off process and owners
Step 2: Research the Market and Competitive Set
Ground your design in context.
- Shelf audit: Photograph facings, observe planograms, and note which packs stand out and why.
- Handling realities: Pocket carry, humidity, and shipping conditions in your top markets.
- Consumer insights: What adult buyers read, feel, and remember on pack in 3 seconds or less.
- Retail feedback: Ask about scuffing, barcode scans, case-pack ergonomics, and returns.
H3 Pro tip: Turn insights into rules
- Codify 3–5 design guardrails (e.g., “matte + anti-scuff on all high-contact panels,” “no full-bleed black on pocket edges”).
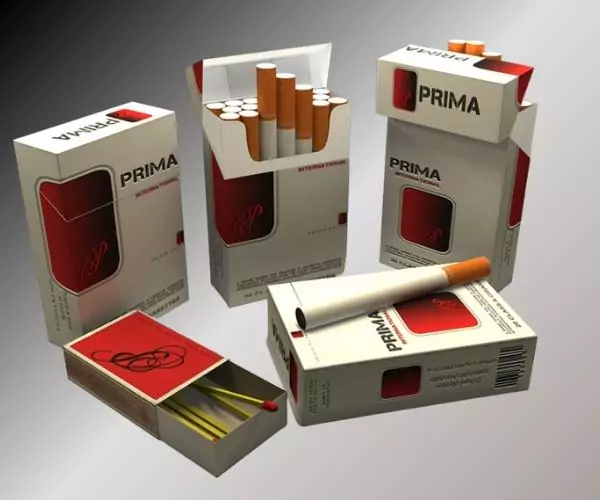
Step 3: Choose a Structure for Your Cigarette Boxes
Structure communicates value and drives durability.
- Hinge-lid (flip-top): Classic, robust, and machine-friendly. Great for premium cues.
- Soft pack: Flexible and cost-efficient; consider reinforcement to reduce crush.
- Slide/drawer or book-style: Special editions only—check local rules before use.
Experience elements to specify:
- Inner frame stiffness for anti-crush performance
- Tear tape placement and width for clean opening
- Overwrap or banderole for tamper evidence
Step 4: Select Materials and Caliper
Materials decide print fidelity, feel, and freight efficiency.
- Board: SBS or FBB for crisp print and structure; consider recycled-content options.
- Caliper: Balance rigidity with pallet efficiency. Run crush tests before committing.
- Liner: Aluminumized paper or recyclable barrier papers; validate freshness and machinability.
- Coatings: Aqueous matte/soft-touch for tactile appeal and scuff resistance.
Sustainability options:
- FSC-certified fibers, 30–50% recycled content, water-based inks, repulpable adhesives.
Step 5: Build a Precise Die-Line
A perfect die-line prevents print creep and assembly headaches.
Include:
- Glue flaps sized for your adhesive and line speed
- Registration targets and color bars
- Crease widths tuned to board caliper
- Knockouts for tax stamps, banderoles, and tear tape
- Live, trim, and bleed layers clearly labeled
H3 Checklist for your die-line
- Layer names standardized
- Keylines on a separate non-printing layer
- Minimum 3 mm bleed around artwork
- Barcode clear zones defined
Step 6: Map Compliance on Your Cigarette Boxes
Design compliance in—don’t bolt it on later.
- Health warnings: Size, contrast, and placement per jurisdiction.
- Track-and-trace: GS1 barcodes, DataMatrix/QR codes, and serialization fields.
- Age and recycling marks: Consistent placement and legibility.
- Plain packaging: If required, lock approved color values, type sizes, and panel layouts.
Document everything:
- Version-controlled artwork, approval logs, and a compliance checklist for each SKU.
Step 7: Create the Visual System: Color, Type, and Hierarchy
Even with constraints, clarity and craft sell.
- Color: Favor mid-tones that hide scuffs; keep strict color management with Pantone targets.
- Typography: High legibility at small sizes; strong information hierarchy for quick scanning.
- White space: Carve room for mandated warnings to avoid squeezed layouts.
Finishes that work (where allowed):
- Matte or soft-touch aqueous coating for premium feel and durability
- Subtle emboss/deboss for tactile cues without sacrificing recyclability
- Spot UV sparingly to highlight critical elements
H3 Pro tip: Design for edge wear
- Shift critical color areas away from high-friction corners; specify anti-scuff varnish on pocket edges.
Step 8: Engineer UX: Liner, Tear, and Overwrap
A neat open and close is a quality signal.
- Inner liner: Optimize barrier performance without excess foil; validate sealing temps.
- Tear tape: Choose paper-based tapes with clean, consistent tears to cut frustration and rewraps.
- Overwrap/banderole: Balance tamper evidence with ease of opening; test for snag/split rates.
User-experience checklist:
- One-sweep tear with no fiber pull
- Lid closes flush with aligned edges
- Minimal residue from adhesives
Step 9: Add Security and Track-and-Trace
Protect revenue and consumers with layered security.
- Overt: Holographic seals, color-shift inks, or tamper-evident features.
- Covert: Microtext, UV-reactive inks, or forensic taggants.
- Digital: Unique serialized QR/DataMatrix tied to a secure database; enable field authentication.
- Integration: Keep features in non-critical art zones to avoid cluttering warning panels.
Supplier expectations:
- Secure data handling for codes
- Retained samples and chain-of-custody documentation
Step 10: Prototype and Test Your Cigarette Boxes
Move quickly from idea to proof.
- White dummies: Validate structure, creases, and fit.
- Printed comps: Check color, finishes, and registration at scale.
- Line trials: Verify gluing, filling, and speed on actual equipment.
Performance tests:
- Pocket carry scuff test (72 hours)
- Humidity and stack compression
- Barcode/serialization scan under low light
- Drop test in outer case packs
H3 Pass/fail thresholds to set
- ≤1% tear failures
- Zero barcode misreads in 200 scans
- Crush resistance meeting your target kPa or ECT
Step 11: Prepare for Production: Prepress and Color Control
Small prepress steps prevent big reprints.
- Color management: ICC profiles, G7/ISO 12647 alignment, approved drawdowns.
- Trapping and overprints: Prevent gaps at folds and fine rules.
- Font handling: Convert to outlines or package with licensing; avoid reflow.
- Separations: Verify white inks, metallics, and coatings on their own plates.
- Proofing: Contract proofs and on-press approvals with measurement targets (delta E ≤ 2–3).
Quality expectations:
- Inline vision systems for print defects
- Retained samples from start/middle/end of run
Step 12: Plan Shipping, Retail, and Iteration
Your Cigarette Boxes must survive the real world.
- Case packs: Optimize count and orientation to prevent edge crush.
- Palletization: Use patterns that distribute weight evenly; add corner boards if needed.
- Retail readiness: Barcodes face forward; packs don’t slip or scuff when fronted.
- E-commerce: Discreet outers, cushioning to prevent crush, and adult-signature workflows.
Measure ROI post-launch:
- Sell-through by SKU/region
- Damage and return rates
- Reprint frequency due to compliance or scuff issues
- Retailer feedback and planogram placement
Iterate quarterly:
- Tweak caliper, coatings, or die-lines based on data
- Standardize learnings across the portfolio
Design Checklists You Can Copy
Brief essentials
- Markets and regulations covered
- Unit cost target and MOQ
- Launch timeline and approvers
Artwork essentials
- Bleed, live, and trim correct
- Warning panels locked and measured
- Barcode clear space met (per GS1)
- Serialization field sized and tested
Press essentials
- Approved drawdowns and proof
- Coating and varnish specs listed
- Registration and delta E targets
- Retained sample policy
Sustainability essentials
- FSC or PEFC chain-of-custody
- Recycled content verified
- Water-based inks and repulpable glue
- Mono-material design where possible
Common Mistakes (And Easy Fixes)
- Designing first, checking regulations later
- Fix: Start with a compliance map on your die-line.
- Overusing dark solids that scuff
- Fix: Shift to mid-tones and specify anti-scuff aqueous.
- Ignoring machine speeds
- Fix: Run line trials; test glues and fold patterns at target RPM.
- Green claims without proof
- Fix: Back every claim with certifications or LCA data.
- No plan for security
- Fix: Add at least one overt and one digital measure tied to serialization.
Bringing It Together: The Quiet Power of Great Packaging
Designing eye-catching Cigarette Boxes isn’t about flashy effects—it’s about disciplined choices that look great, run fast, and respect the rules. When you align goals, pick the right materials, engineer a clean open, and test relentlessly, you get packs that win with retailers and adult consumers alike.
Ready to see the difference in hand? Kick off with a packaging audit, request two prototypes (current vs. optimized specs), run pocket and line trials, and roll out the winner with confidence.
FAQs
What are the most common structures for Cigarette Boxes?
Hinge-lid (flip-top) for durability and premium cues; soft packs for cost efficiency; slide/drawer for special editions where allowed. Always validate against local regulations.
Which materials balance print quality and sustainability?
SBS or FBB with 30–50% recycled content, FSC-certified fibers, water-based inks, and an anti-scuff aqueous coating. Choose caliper through crush and humidity tests, not guesswork.
How do I keep designs compliant across multiple regions?
Build a “master” die-line with locked zones for health warnings, tax stamps, and serialization. Version control the artwork per market and maintain approval logs with dates and sign-offs.
Can I use premium finishes in plain-pack markets?
Usually no. Focus on craftsmanship: precise color, tidy folds, scuff-resistant aqueous finishes, and strong inner frames. Invest in security and track-and-trace for added value.
What timeline should I expect from brief to shelf?
Typical: 6–10 weeks. Brief/alignment (1), die-line and design (1–2), prototypes and line trials (2–3), prepress and production (1–3), logistics and retail prep (1). Reorders are faster once specs are locked.